Instructions Google Calendar API for Xibo plugin

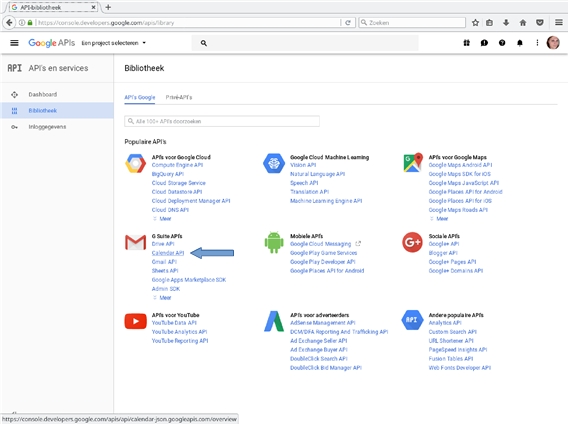
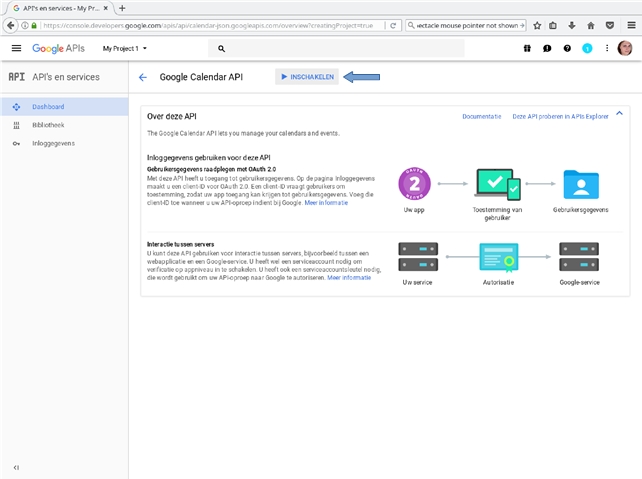
To begin with, we open the web address console.developers.google.com on a web browser. What we need is the Calendar API. This is part of the G Suite APIs and is indicated by an arrow. Click on this.
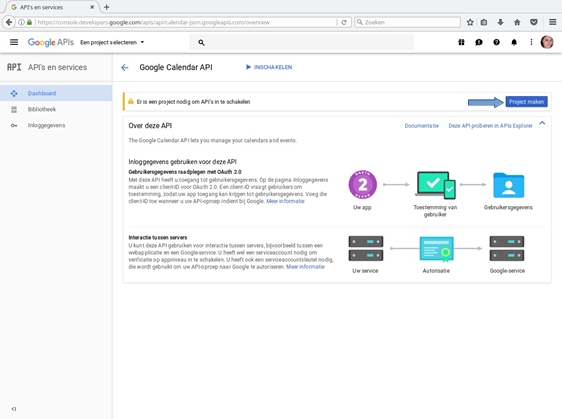
We are greeted with a window describing what the Google Calendar API is and how it can be achieved. For that, however, we need a project that will link the interaction method we will use later to a key and the API in question. To do this, click the blue button with “Create a project”.
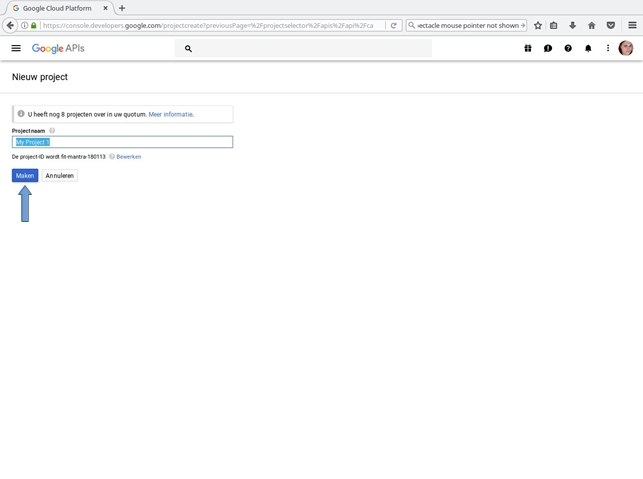
Type a project name that is easy to recognize later on. Click the Create button to create the new project. This can take a while.
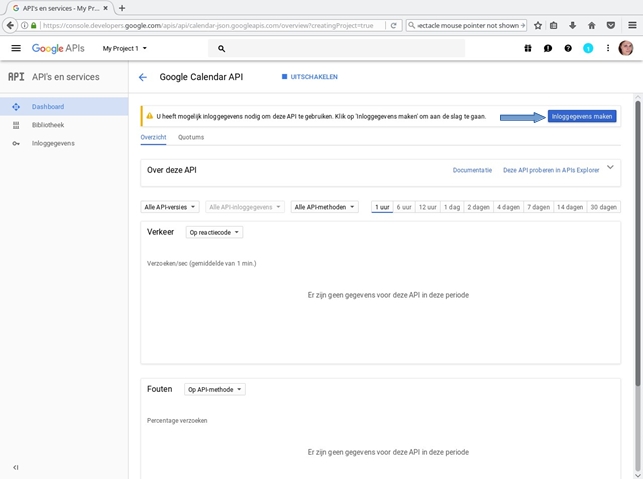
You are now back in the Google Calendar API window. As you can see, your newly created project is now selected, at the top left of the window, and the warning that a project is required is now gone. Now, we’re going to enable this API in this project. To do this, click on “Enable.”
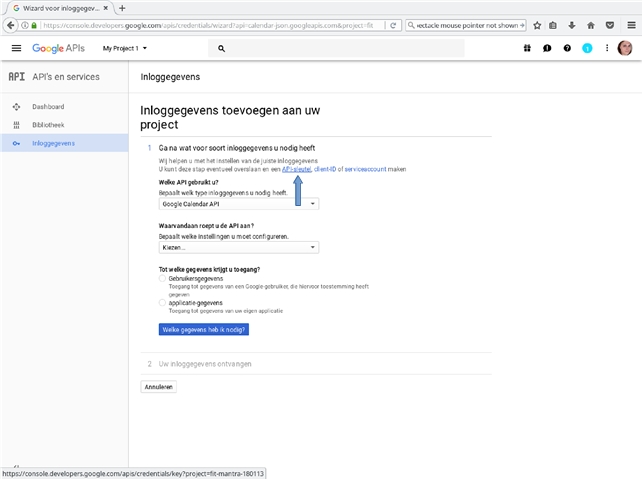
You have now arrived at the project Dashboard, The next step needed to use this API (which we have just enabled in this project) is to create login data, which is used by software that wishes to communicate with this API. While Google has a limited set of APIs, Google offers the ability to request anonymous information, but it is subject to strict restrictions. Moreover, it is not so neat. We are going to create so-called API keys. To start with this, click on the blue button “Create login data.” Google now starts with a wizard, which serves to help determine what type of login information is required.
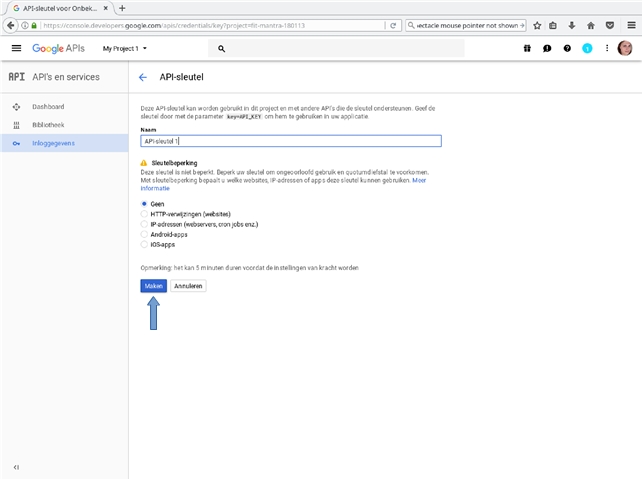
We already know exactly what we need, so we do not need this wizard anymore. Just below the start of step 1 you will find three links. Click the link with the text “API Key”. You can now enter an easily recognizable name for the API key to generate.
Here you can also specify restrictions as desired. This defines what additional requirements a client with the key must meet to make use of. For example: IP address limitation states that only requests from that IP address in combination with the key will be accepted. This is intended to prevent abuse and further not immediately relevant.
We do not introduce any restrictions for a while, as it will always be possible. Click the blue Create button to generate the API key. The API key has been created and can now be used.
We can now copy this key and insert it into our client software configuration. Do not panic if you’ve clicked “close” by accident; The key will still be displayed on the “Login” page.